How to add a beehiiv form to a Framer site
Robin Louw
|
This guide covers adding a subscription or waiting list beehiiv form using either the embed or webhook method to a Framer website.
What is beehiiv and Framer?
Launched in 2021, beehiiv is an all-in-one newsletter platform built specifically to help creators, writers, and digital publishers draft, send, monetise, and scale email newsletters. However, it is more than just a newsletter platform.
Here is a listing of some of the features beehiiv provides:
Newletters
Websites and an AI website builder
Podcasts
Unlimited email sends
AI Assistant
Ad network (paid plan)
Sell digital products (paid plan)
Community (paid plan)
MCP read and write access (paid plan)
Framer on the other hand is a visual website builder and design tool that lets you design, animate, and publish production-ready websites without writing code. Since Framer 3.0 was released, it has been an AI-first builder and is ideal for startups, small businesses, or individuals that need landing pages, designer portfolios, marketing sites, and blogs that look world class.
Even though beehiiv allows you to build websites, which is included with a beehiiv subscription. This guide will cover a scenario for integrating beehiiv forms into an existing Framer site.
Regarding pricing, both beehiiv and Framer allow you to start on a free plan and scale accordingly according to your needs.
Try beehiiv and get 20% off for 3 months
Option 1: Embedded Form
This would be the quickest and simplest method and will make use of beehiiv's styling.
1. Build form and get the beehiiv embed code
In beehiiv, go to Subscribers → Subscribe Forms.
Click Create new form (or select an existing one) and design your form layout.
Click Save & get embed code and copy the raw HTML script snippet.
2. Paste into Framer
Open your Framer project.
Open the Insert menu (or press I).
Go to Utility → drag the Embed component onto your page canvas or section.
In the right panel under Embed, choose HTML mode and paste your beehiiv code snippet.
Resize the embed container to fit your design.
Alternatively, make use of the Framer AI agent by selecting the section on the page and using this prompt example:
Add my beehiiv subscription form here, my embed code is [your embed code]
3. Test the form
Preview your Framer site, Fill out the form, and hit submit. Verify that the subscriber shows up in your beehiiv Audience dashboard.
Option 2: Framer Native Form + Webhook
If you prefer total design control using Framer's native form builder, connect Framer's form to beehiiv using a custom webhook using a service like Make.com or Zapier. I will be making use of Make.com for this guide. The option to make use of a webhook is only available on paid beehiiv plans.
1. Get your beehiiv API Key & Publication ID
In beehiiv, go to Settings → API
Generate a New API Key (verification needed) and copy both your key and Publication ID (API V2)
2. Set up a Make webhook scenario
Log into your Make account.
Navigate to Scenarios → Create a New Scenario
Add a beehiiv webhook module by searching for beehiiv → Choose 'Watch for subscribers' (the trigger)
Create a webhook and give it a name
Save and copy the unique webhook URL provided for step 3
Add another beehiv module called 'Create Subscriber' (the action)
Create a connection using your API details
For the email address field, select or search for the matching email fields
If required, fill out the rest of the fields or custom fields to match the form (I will skip adding the First name field for the test)
3. Configure webhook in beehiiv
Log into your beehiiv account and scroll down to Settings → Webhooks
Create a Webhook Endpoint
Paste the endpoint URL from Step 2, add a description and continue
For this event type 'subscription.created' is selected and then create webhook
4. Connect the Webhook to Framer
In Framer, insert a native Form component from the Insert → Forms menu
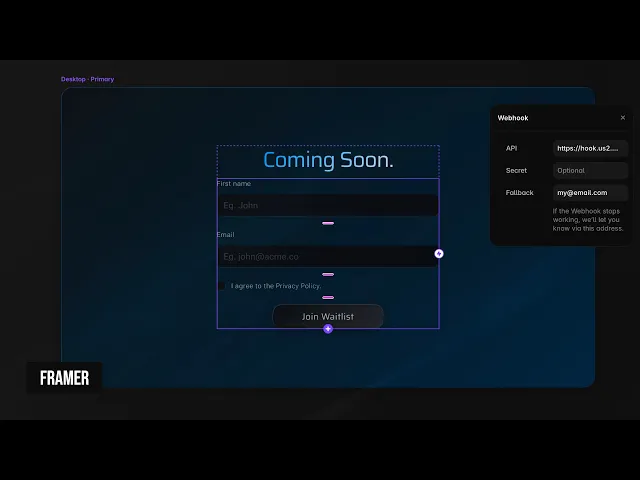
In the right-hand panel, set the form 'send to' action as Webhook
Paste the webhook URL you copied from Step 2 and continue
Alternatively, make use of the Framer AI agent by selecting the section on the page and using this prompt example:
Make the selected form functional. The form will make use of a webhook using this URL [your webhook URL]
5. Test the form
Return to your Make account, Run a test by Choosing Run once
Preview your Framer site, fill out the form, and hit submit. Verify that the subscriber shows up in your beehiiv Audience dashboard
Once successful, keep the webhook toggled as on
Send a welcome email
Once a form is tested and confirmed to work, it’s recommended to send a welcome email for new subscribers. beehiiv lets you create a single welcome email or welcome automation. If you don’t plan to use advanced segmentation or a multi-step welcome automation, a single welcome email is sufficient and available on all plans, including the free one. Automation requires a paid plan. I’ll cover both below.
Option 1: Welcome Email
In beehiiv, go to Settings
Select Emails
Scroll down to the Preset Emails section → Welcome Email → Configure Welcome Email (if not set up)
On the welcome email edit page, configure your email by adding a subject line, preview text, content, etc.
Preview and publish when satisfied and return to the Emails page
Toggle the option to send a welcome email as active
If you transition from a welcome email to a welcome automation flow, remember to disable the welcome email under Settings, as the welcome email will continue to be sent alongside the automation.
Option 2: Welcome Automation
In beehiiv, go to Automations
Click Create your first automation (if none already exist)
Choose either to create from scratch or from a template (I will choose template)
Choose the 'Welcome Email (with re-entry)' template
Edit the email template used for 'Send Email' (I will delete and add my own)
Publish changes
Test the form again to confirm the changes
Conclusion
As an all-in-one newsletter platform, beehiiv provides all the tools needed to grow and engage with your subscriber list. Embedding a beehiiv form into a Framer site is relatively easy and can be done using the AI agent. However, a custom-styled form with a webhook will be more technical to set up and will require a paid beehiiv plan and possibly a service like Make.com. Another important point is to ensure your form complies with privacy laws and includes consent or a link to the privacy policy or legal pages.
Try beehiiv and get 20% off for 3 months
Thanks for visiting Design Chillout! While you’re here, don’t forget to check out the designer toolkit or grab something from the cooler box!
Affiliate Disclaimer:
This page contains affiliate links. Site content is supported by awesome visitors like you who buy after clicking on a link, at no extra cost to you.
AI disclaimer:
This article contains original content. However, AI may have been used to generate content from existing sources, or to correct the grammar, spelling, and formatting.